How to Use OptinMonster with FluentCRM
If you want to use OptinMonster with FluentCRM, you need to integrate with a WebHook. Unfortunately, just creating a WebHook isn’t enough to get these tools to communicate with each other. You need to map the fields to transfer between OptinMonster and FluentCRM.
That’s what I’m going to show you how to do in this post, step by step.
Why Connect OptinMonster with FluentCRM using a WebHook?
At the time I’m writing this article, OptinMonster hasn’t built a native integration with FluentCRM. You can easily connect OptinMonster to many of the SaaS email service providers, but systems without a native integration rely upon a WebHook. It’s the same technology Zapier uses to integrate so many different applications.
The problem we face when connecting OptinMonster with FluentCRM via WebHook is that neither tool provides an easy way to map fields when they communicate.
Without this field mapping process, the transfer fails and FluentCRM cannot successfully determine the data structure coming from OptinMonster.
It seems that OptinMonster sends more information than FluentCRM expects.
How Do You Map Fields from OptinMonster with FluentCRM?
OptinMonster has a few tools to help us with the process. It’s a bit technical, but it works.
You can use the OptinMonster Success Triggered Scripts to trigger a Post request in JavaScript. I’ll share that script with you below.
Then you can use OptinMonster Smart Tags to send the data to FluentCRM. Smart Tags require a Pro or higher subscription plan with OptinMonster.
1: Create Your OptinMonster Form
The first thing you need to do is create your OptinMonster form. Doesn’t matter what type. I’ve tested this process with Inline, Popup ad Slide-in forms.
Once your design is correct, you’re ready to work on the Integration details.
2: Create an Incoming Web Hook in FluentCRM
Inside of WordPress, go to the FluentCRM Settings menu option. Once there, select Incoming Web Hooks.
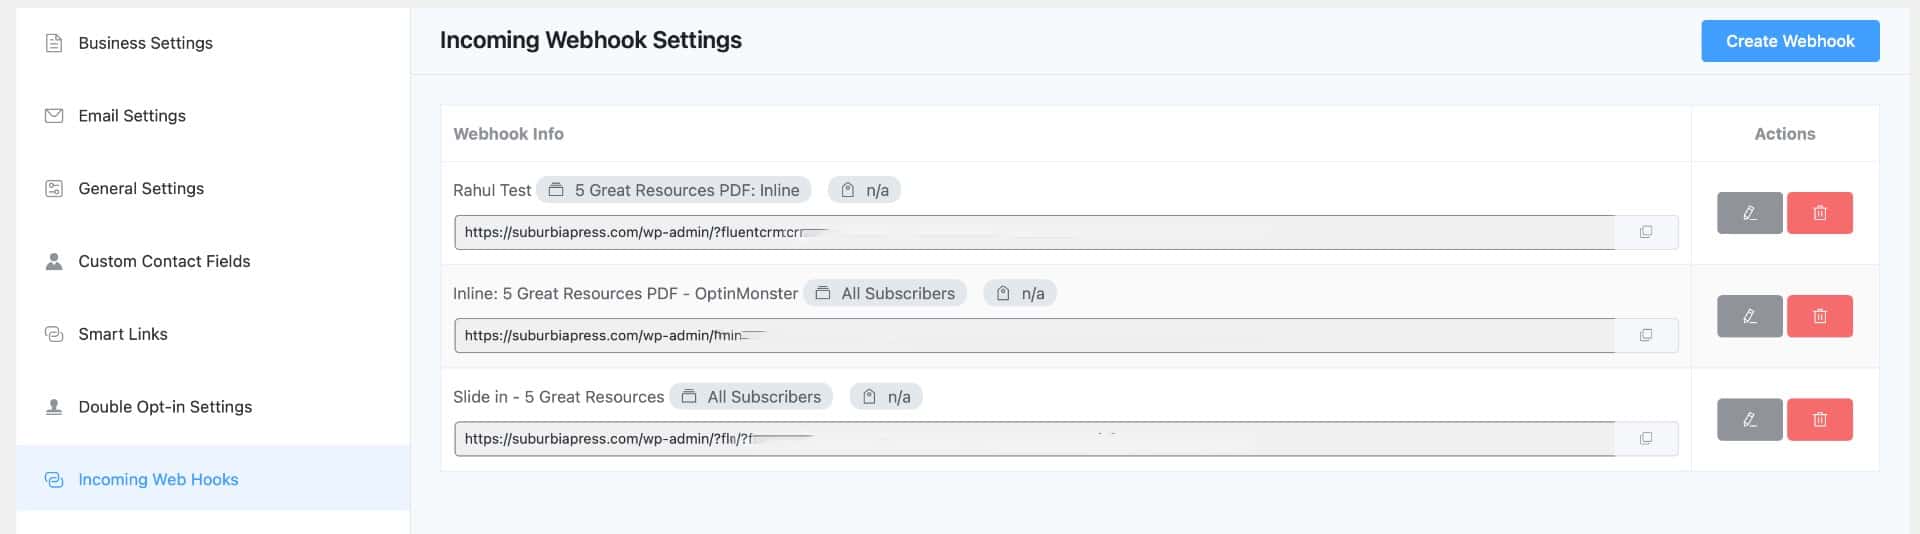
Click the blue button in the upper right corner to Create Webhook. You’ll see a form like this appear.
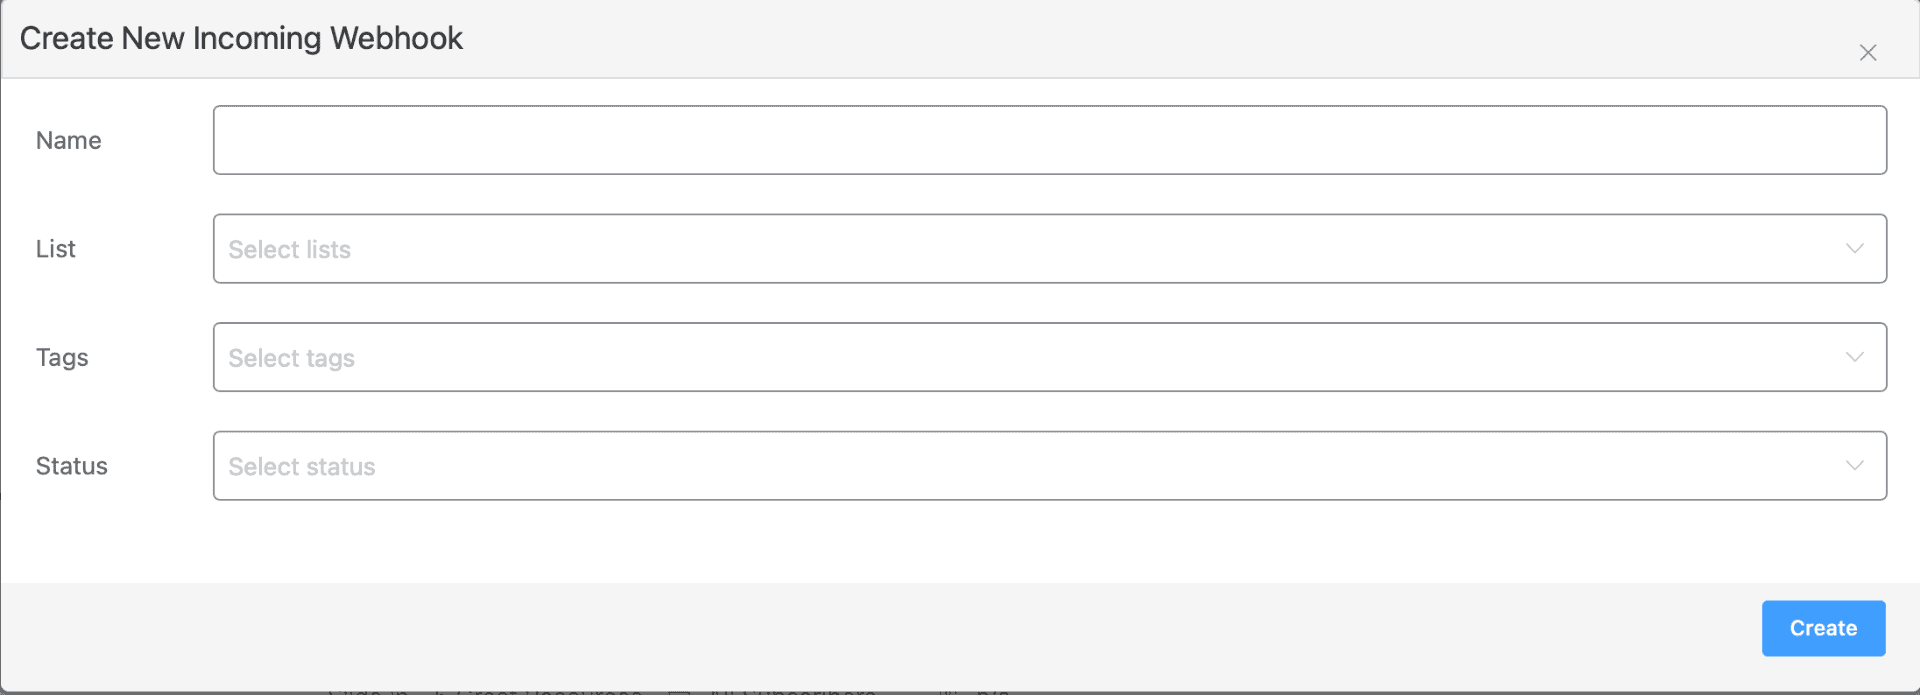
The name field is whatever you want to call it so you know the purpose of the WebHook. You can have a subscriber automatically added to a List or have Tags applied in the next two fields.
The Status field has two options.

Use Pending if you want the subscriber to confirm by email. If you use Subscribed, no confirmation email gets sent and the subscriber is ready to receive emails from FluentCRM.
Once you click the Create button, you get a screen like this one.
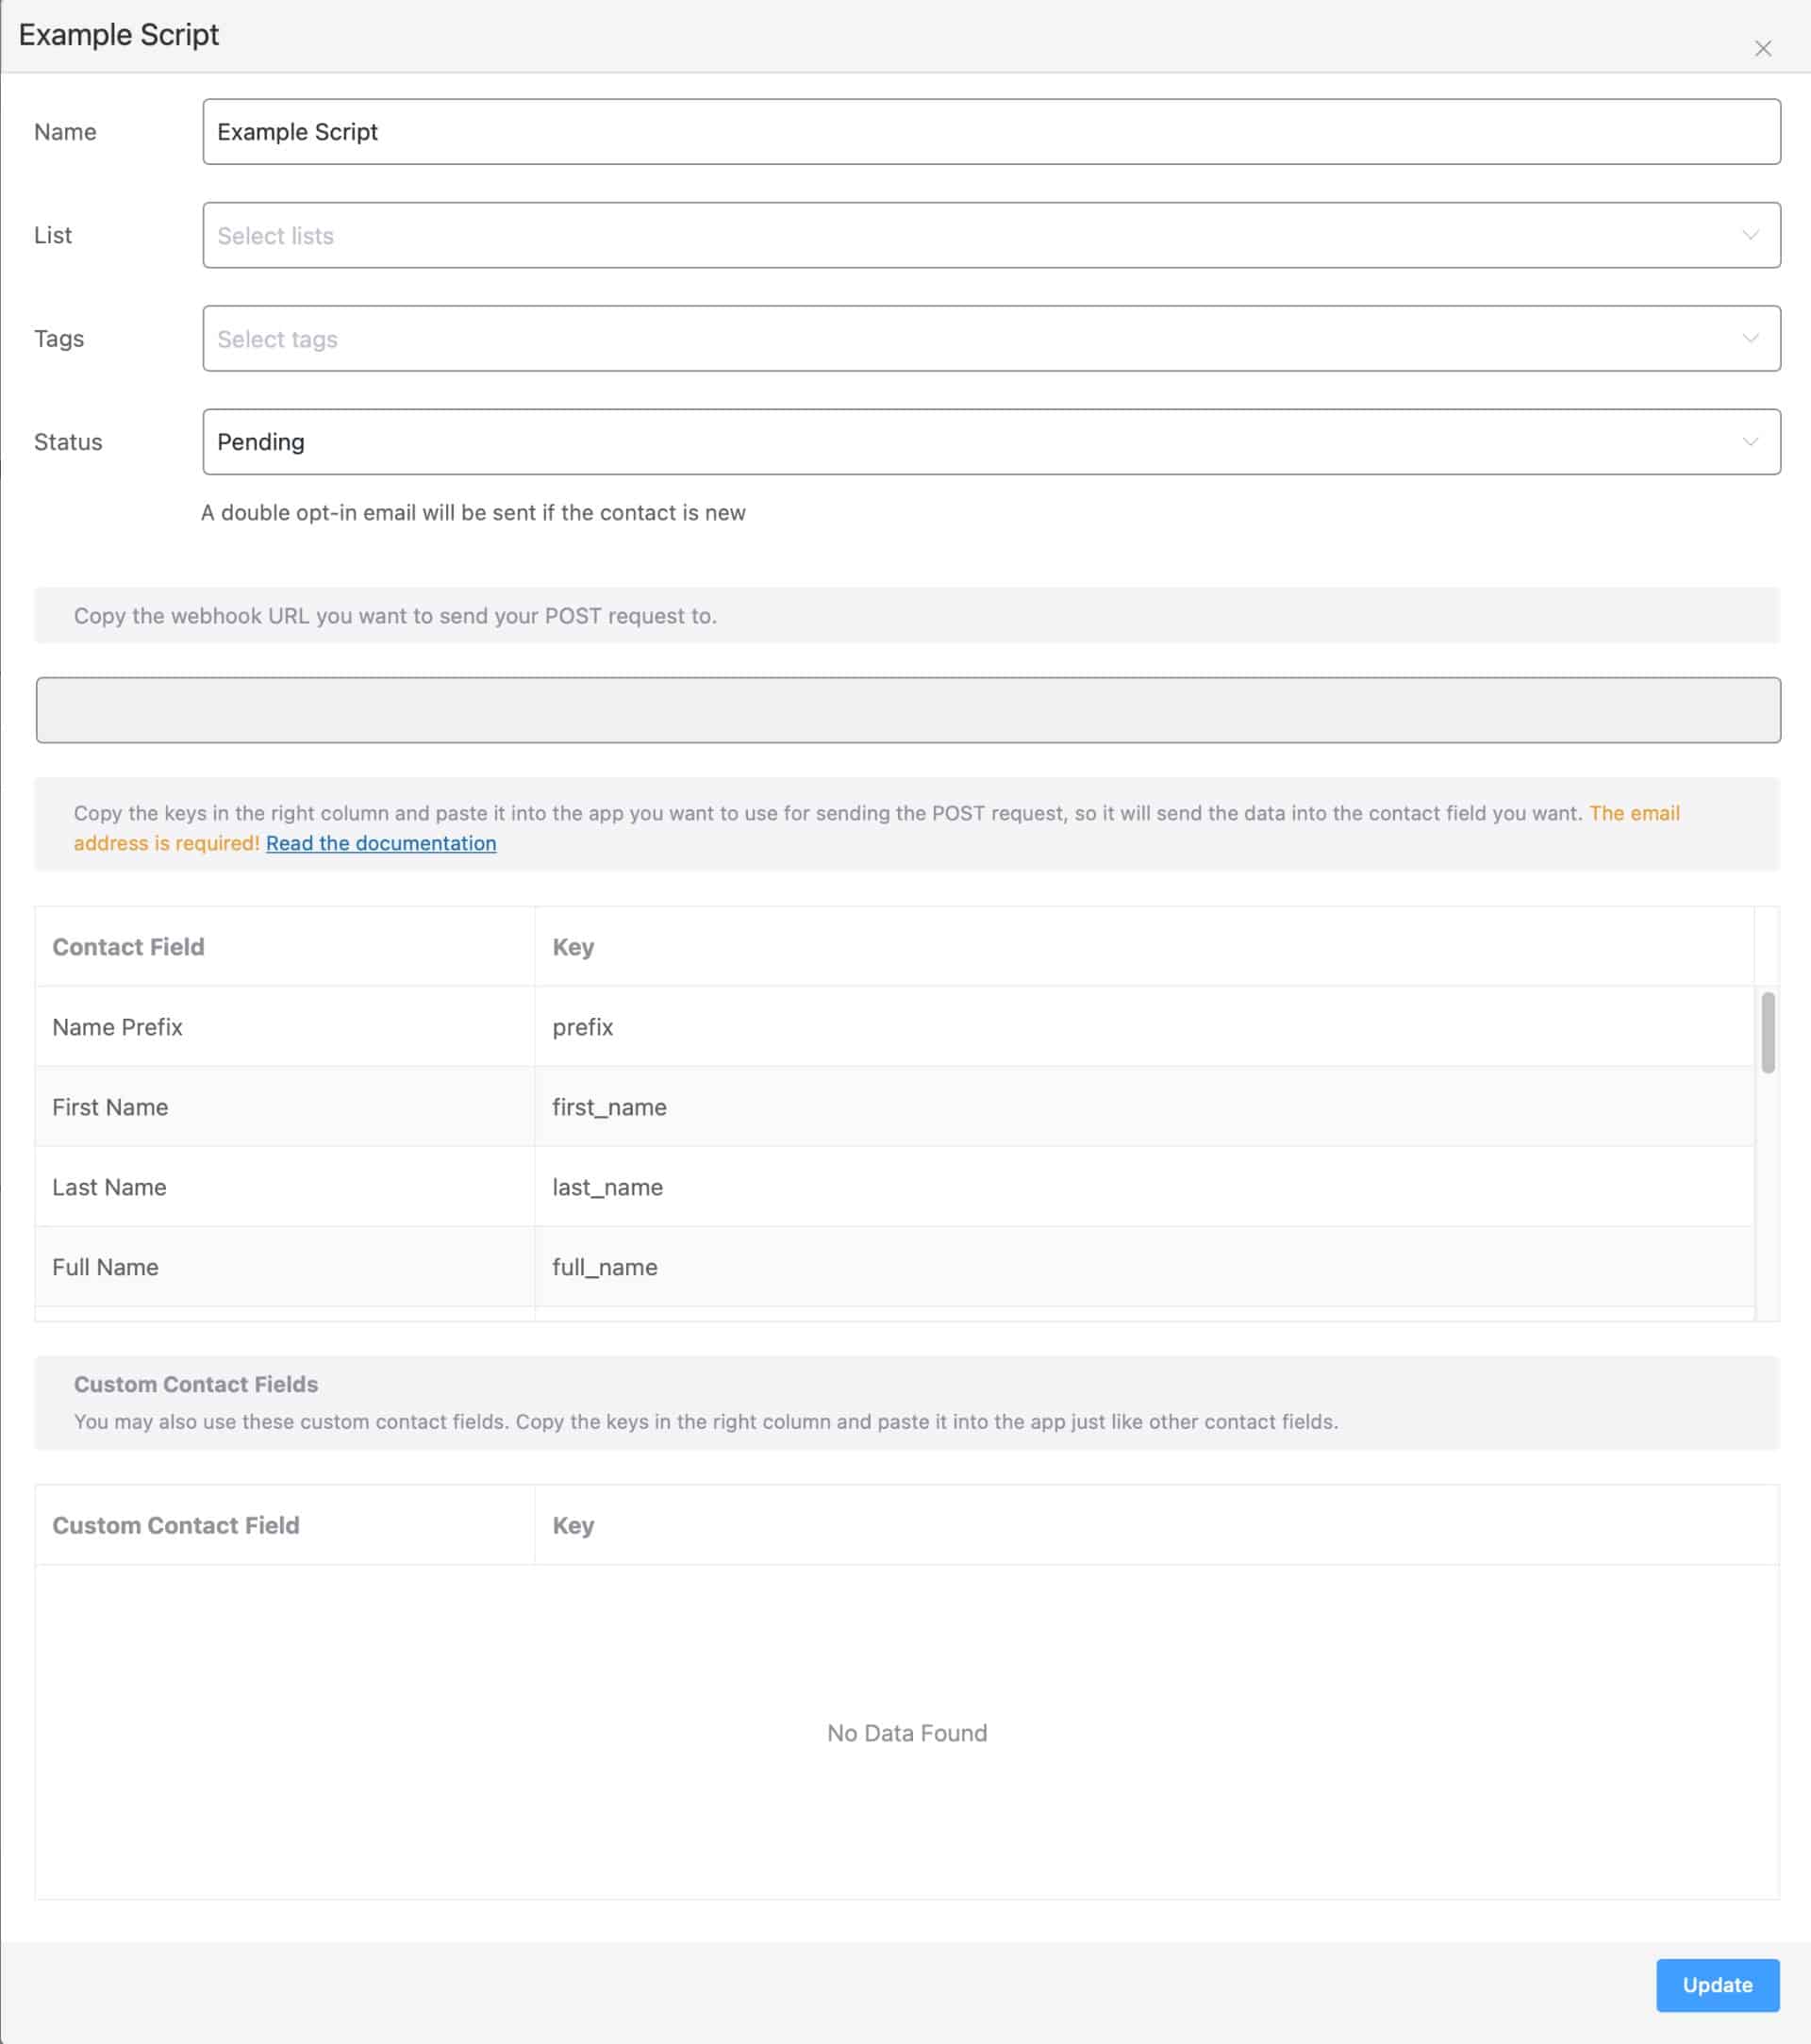
notice that you don’t see the webhook URL in this form. Click the Update button and you’ll return to the FluentCRM Incoming WebHook page.
Your webhook URL will appear there.
3: Create The Success Triggered Script
Now that you have your webhook URL, you’ll use it inside of this script.
<script>
	(function(req) {
		if ( req ) {
			var xhr = new req();
			xhr.open('POST', 'https://yourdomain.com/wp-admin/?fluentcrm=1&route=contact&hash=blah-blah-blah-blah-blah', true);
			xhr.setRequestHeader('Content-Type', 'application/x-www-form-urlencoded');
			xhr.send('email={{form_email}}&full_name={{form_name}}&first_name={{form_first_name}}&last_name={{form_last_name}}&phone={{form_phone}}&city={{city}}&state={{state}}&postal_code={{postal_code}}&country={{country}}&source={{campaign_name}}');
		}
	})(XMLHttpRequest);
</script>
The URL shown in bold is the webhook URL. You need to replace this code with the webhook URL from your FluentCRM installation. Otherwise, your form will send data to my Example script shown here.
Not really. Those lines of blah-blah-blah aren’t really working, but it would still be a waste of your traffic.
If you look carefully at this script, you can see that it’s mapping the form field data to FluentCRM variables.
4: Enter the Script in Your OptinMonster Form
Open your OptinMonster form and click the button you want your subscribers to click to submit the form.
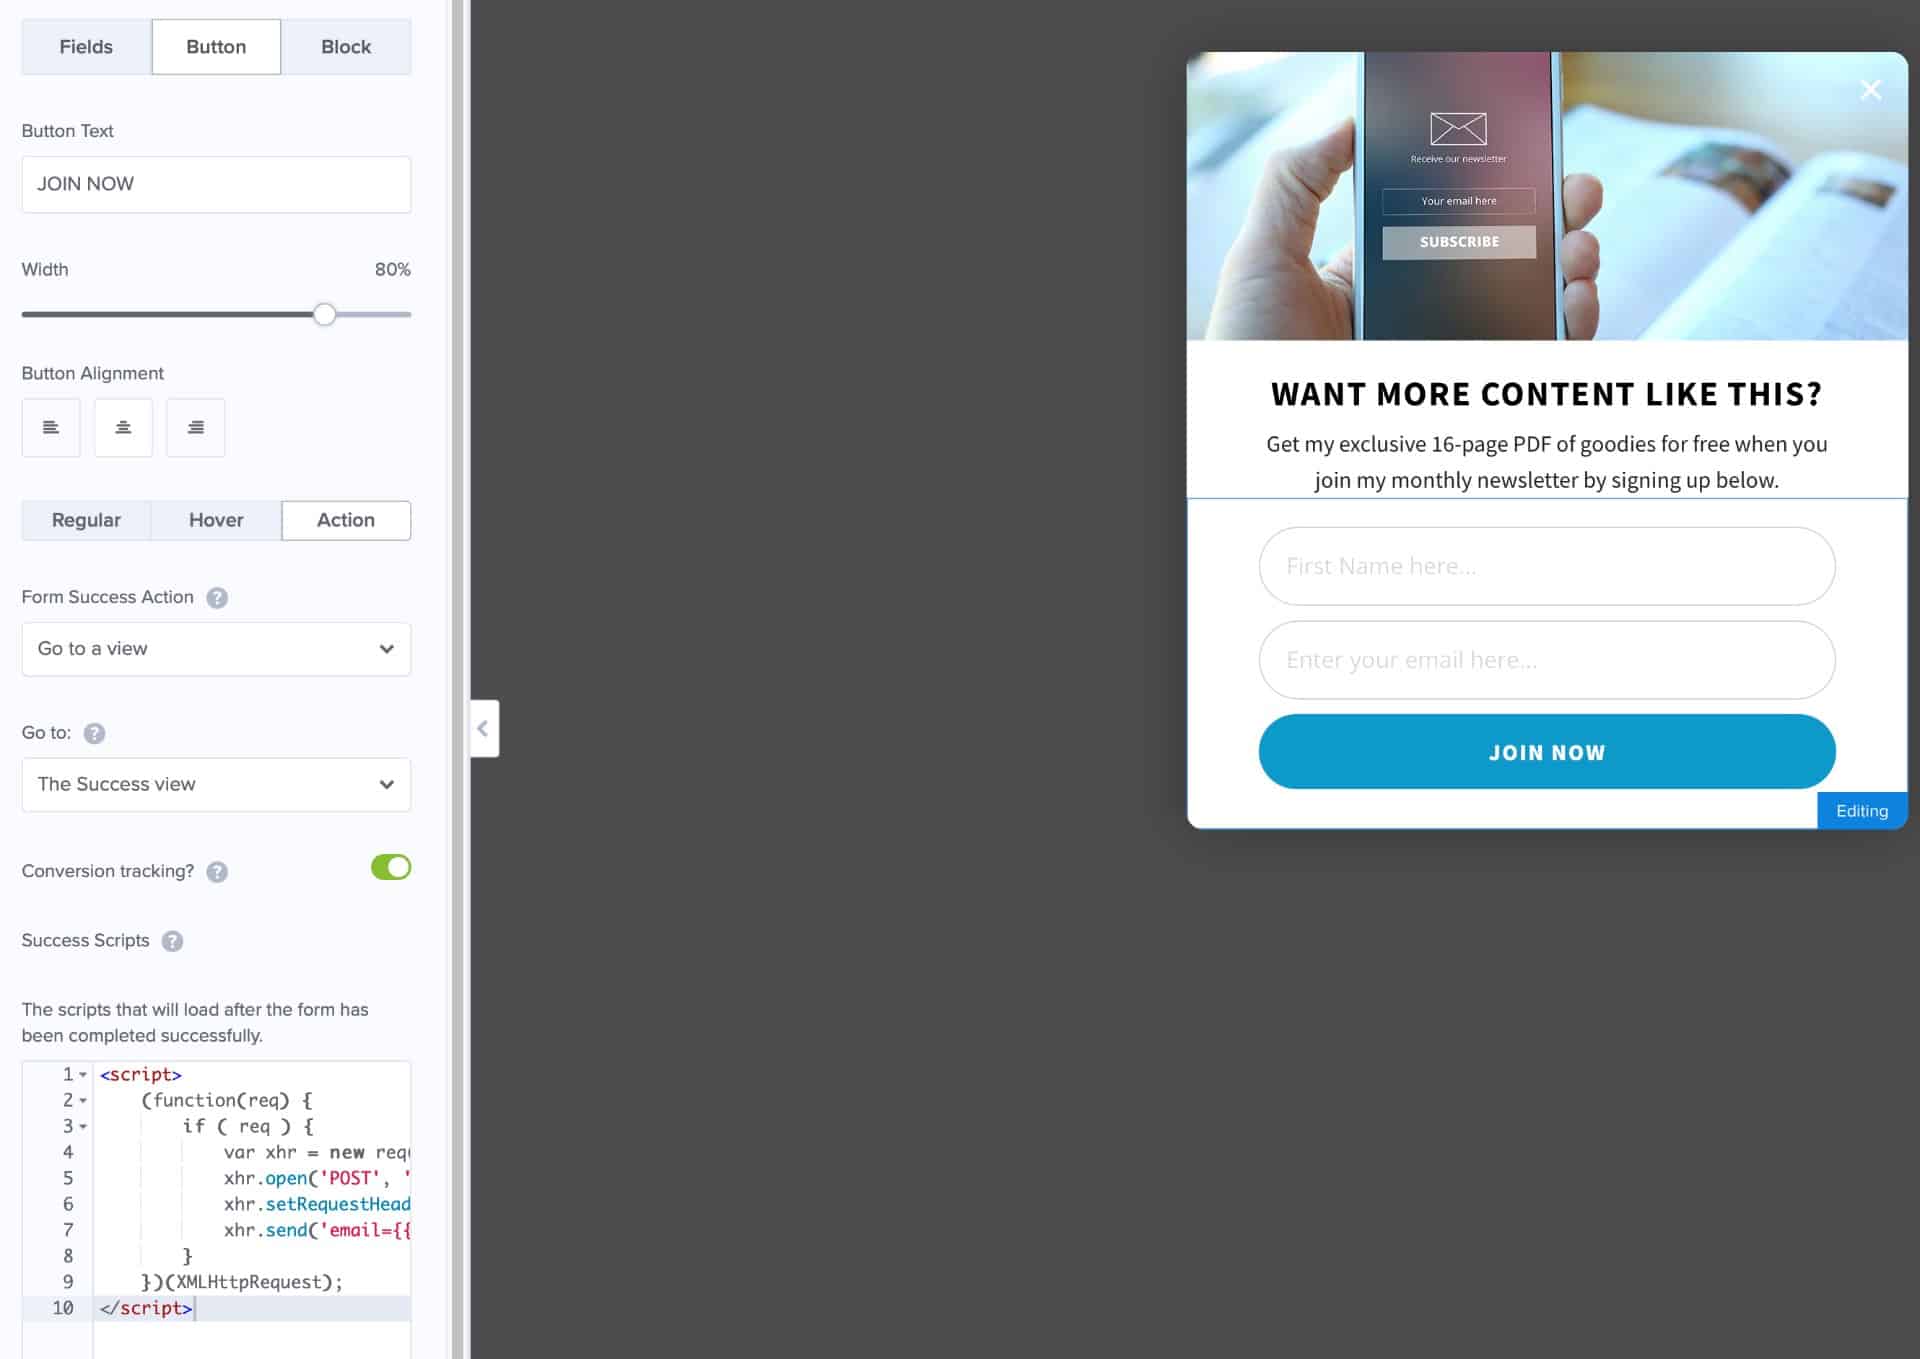
In the example above, you would click the JOIN NOW button on the form.
The left side panel will display some options for the Button. Notice the Action button to the Right of the Regular and Hover buttons. Click the Action button to reveal its settings.
You need to copy and paste your script and place it in the Success Scripts field, as shown on the lower left of the image above.
5: Set OptinMonster Integration
The only integration you need for this form is Monster Leads, as shown below.
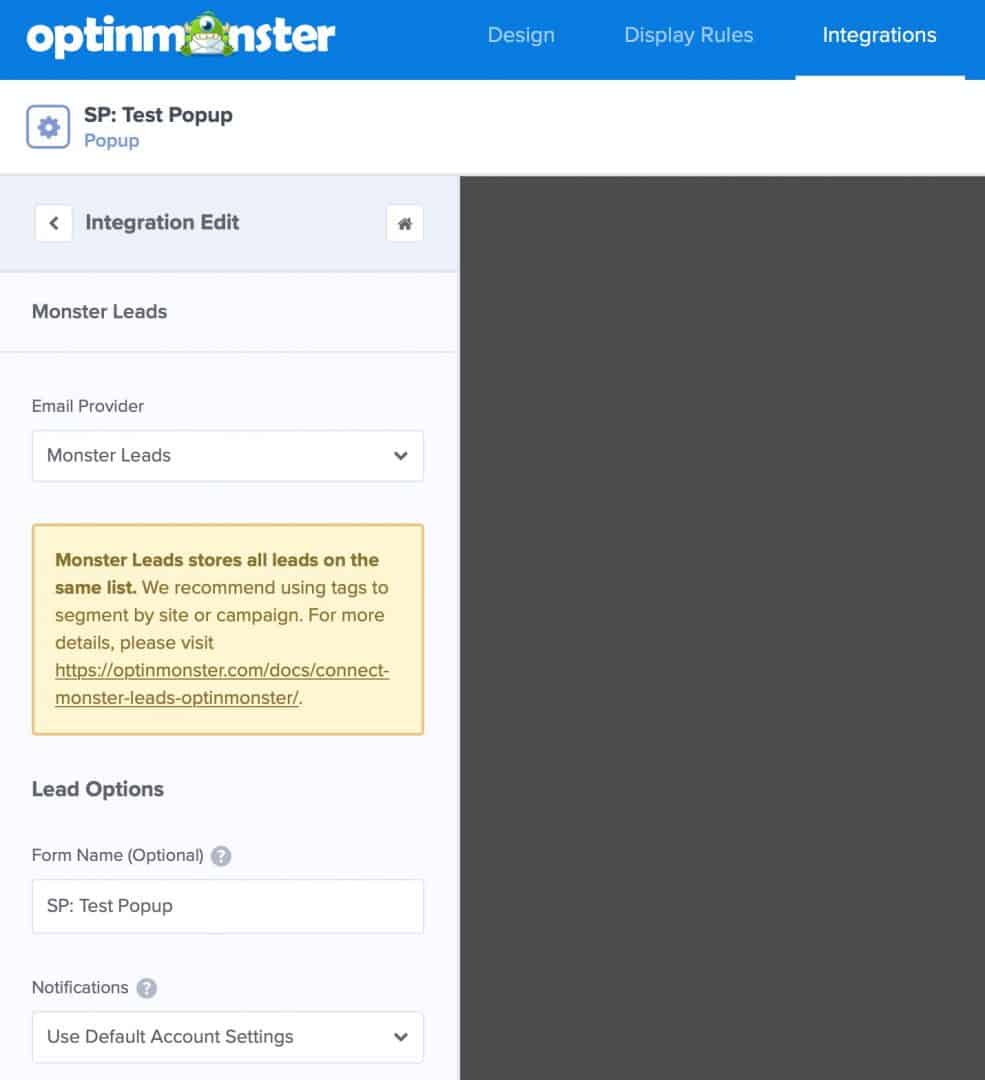
You’re not going to use the OptinMonster webhook integration, because we cannot control the data sent through that method. The script shown above handles the form data transfer.
OptinMonster uses Monster Leads because some kind they require some kind of integration. Then OptinMonster sends the POST request with the smart tags dynamically replaced through the script.
It’s CRITICAL that you do not add a WebHook integration in OptionMonster, or anything other than the Monster Leads. If you do so, the integration will fail.
6: WP Rocket Causes a Problem by Default
I use WP Rocket, and noticed a problem. My forms weren’t loading as expected.
That’s because WP Rocket ships with some defaults to Delay Javascript, and one of the defaults suppresses OptinMonster forms.
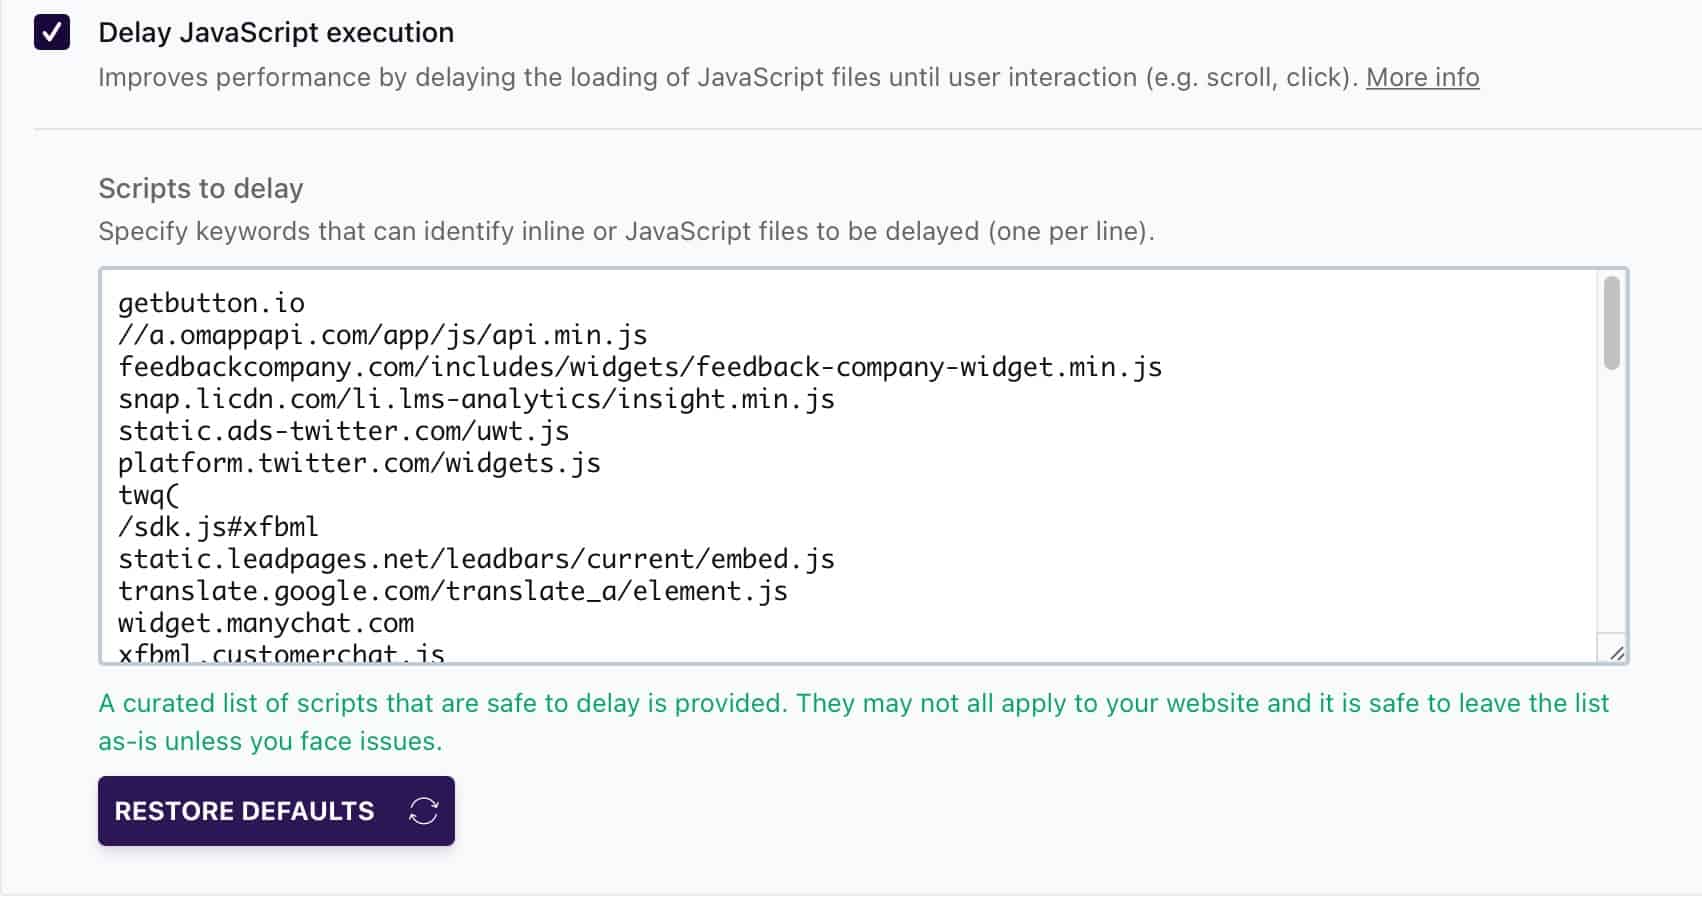
You need to remove the second line from this list.
//a.omappapi.com/app/js/api.min.jsI’m not sure why it’s there by default in WP Rocket, but it definitely delays the loading of your OptinMonster forms. It was strange to visit a page with an embedded form and not see it, at least until later.
Thank You to OptinMonster & FluentCRM Support
I’d love to tell you that I figured all of this out myself, but I didn’t. This came about due to great support teams at OptinMonster and FluentCRM. We have a solution now because they cooperated with each other.
At some point, I’m sure we’ll have a native integration to use OptinMonster with FluentCRM. That would be ideal and much easier to implement.
For now, I just want to point out these two teams as an example of how important great support is when you buy something that you use to build your business. I’m happy to recommend using OptinMonster with FluentCRM.
It’s only going to get better.
Not sure which email marketing service provider is right for your business? Check out our email marketing services.
Best Email Marketing Services