
FluentCRM Cron Jobs
In order to schedule any email campaigns or email sequences for delivery inside of FluentCRM, you must first have a cron job that triggers the event to send your email.
Cron jobs are relatively easy to configure, but there are a few steps, and we’ll walk you through the process in this article. We’ll also show you where to look if you need to troubleshoot a problem with your cron job, just in case your scheduled emails aren’t delivered on time.
If this is your first visit here, you may want to read my FluentCRM Review. There are also several other articles and videos for FluentCRM on this site and my YouTube channel.
Video: FluentCRM Cron Jobs:
How to Configure a FluentCRM Cron Job
A cron job is merely a time-based scheduler. It’s a clock that triggers some action to happen at the determined time. You can set a cron job to occur by the minute or hour, or many other time intervals.
For FluentCRM, use a cron job as short as a minute. Some hosts may not allow you to schedule a cron job that runs so frequently. You can either accept their limitations for an internal cron job or you can use an external service, which you’ll see below.
Follow the steps below to create a cron job for FluentCRM. You can also refer to the official documentation to Replace WordPress Cron with a Real Cron Job.
How to Disable WordPress Cron
To get started, you want to disable the WordPress Cron service. Unfortunately, it’s unreliable and may cause problems by not delivering your emails on time.
To do this, you need to edit the WordPress wp-config.php file and add the following line.
define('DISABLE_WP_CRON', 'true');
The easiest way to access this file is to use your FTP client. If you’re not comfortable using FTP, you can also edit the file within WordPress using a plugin. Please make a copy or backup of your file before making changes, in case you need to revert to the original state.

Go to your WordPress Plugins and click the button to Add New.
Type “file manager” in the search box and select the option shown above in the red border. You can use this to access your wpconfig.php file.
Make sure you Deactivate and Delete this plugin once you’re done. It may present a potential hazard to your site if some nefarious soul gets access to it.
After adding the line of code to your wpconfig.php file, it’s time to create your cron job.
How to create Cron jobs for FluentCRM
The way to create your Cron job varies from one host to the next. Some hosts allow you to directly create your own Cron job. Others will suggest that you let them handle it. You can also use an external service, like cron-job.org, to call your WordPress system to trigger events.
Your Cron job ultimately makes a call to the wp-cron.php file in your WordPress environment.
How to create an External Cron Job
You can register for a free account at cron-job.org. It’s a service dedicated to running Cron jobs for many sites and it’s quite reliable. There are some WordPress hosts, like Site Ground, which may block this service. Check with your host or do a test to be sure.
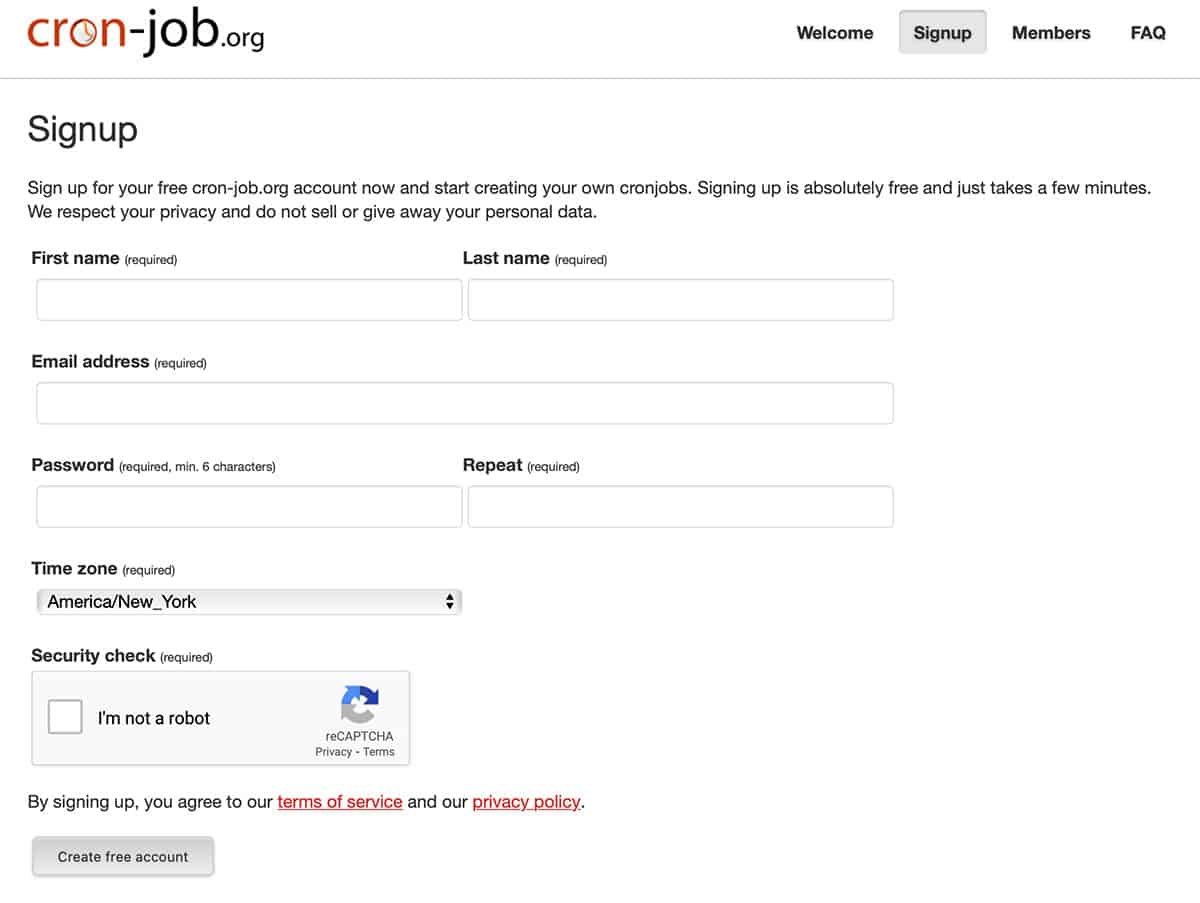
After you create your account head over to the Members area and click the Cronjobs button along the top.
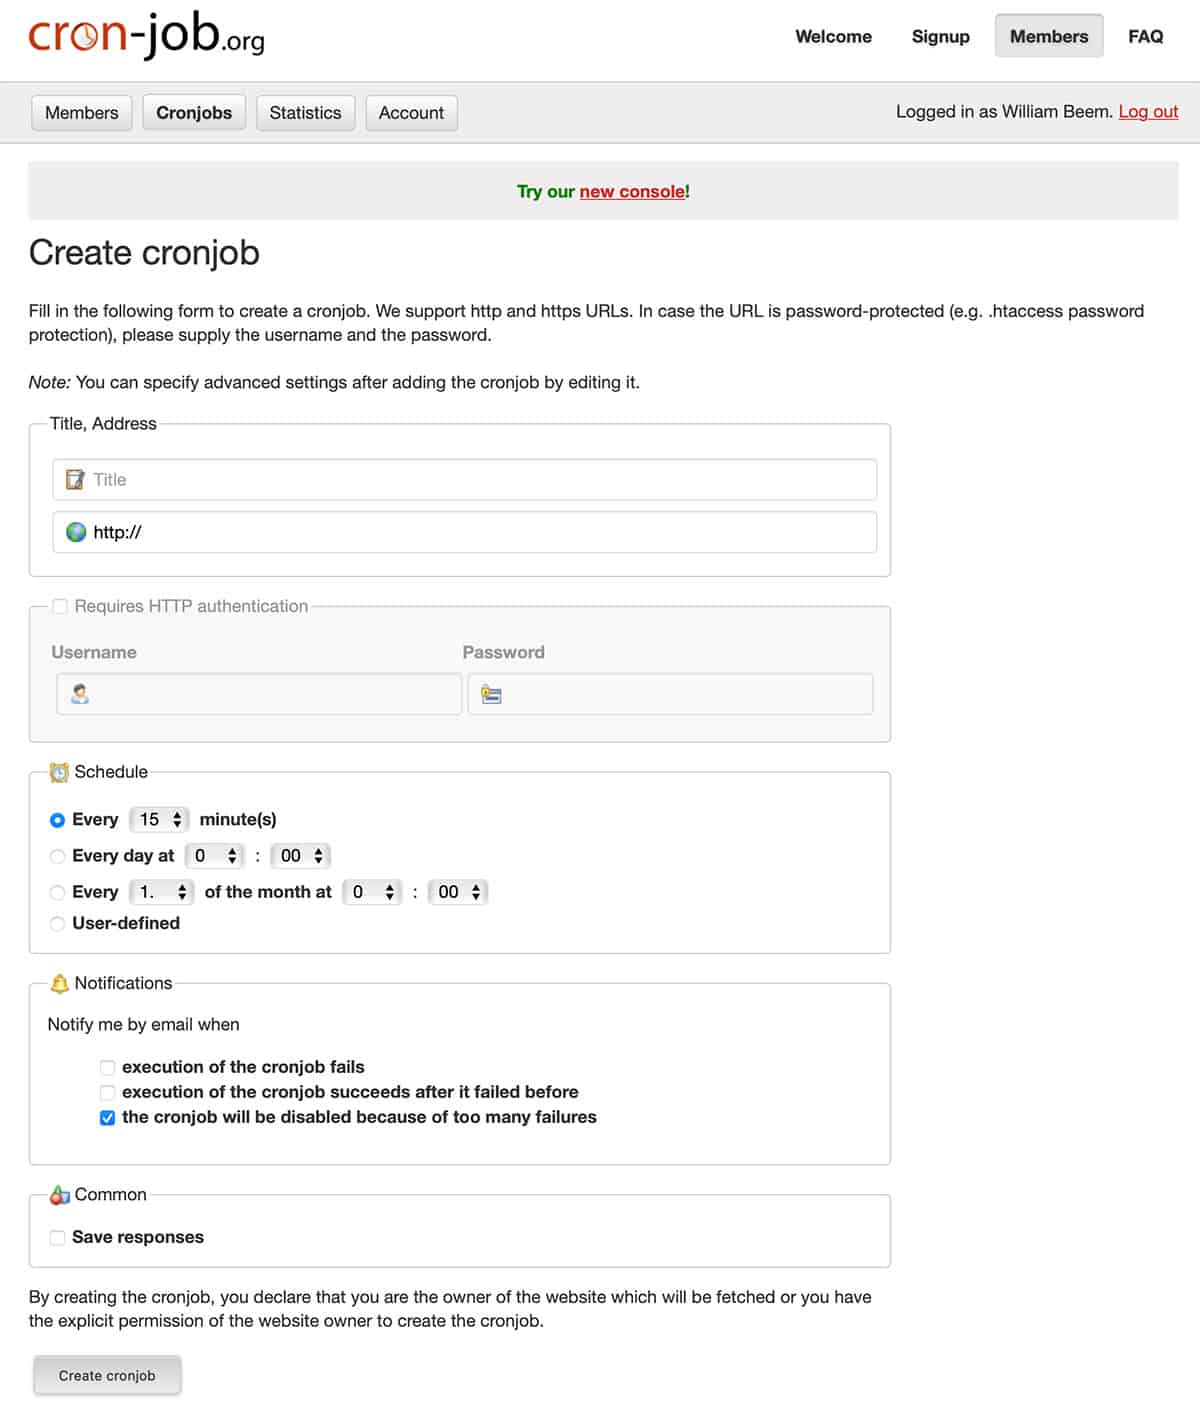
The title is for your benefit so you can identify your cron job. The URL underneath needs to follow this format. Make sure you replace the domain with your actual domain.
https://yourdomain.com/wp-cron.php?doing_cron
In most cases, you don’t need to require authentication.
Set the schedule to run every minute. I leave the notifications as the default. There may be times when a Cron job fails due to a temporary internet glitch, so those messages may not be pertinent.
The notice when the Cron job fails due to too many failures is relevant. That means the service tried repeatedly without response, so you need to see if your WordPress server is down or some other issue blocks communication between it and the cron-job.org server.
You may see an option in the last field to Enable the job, which appears if it was disabled for any reason. Make sure to check that box to turn on the Cron job service again.
How to create a Cron job in a Cloudways server
Cloudways is a VPS hosting service that allows you to create and manage your own Cron jobs. Setting up a server-side Cron job is preferable, as it eliminates network communication and delays in firing your Cron tasks.
Here’s the Cloudways Cron Job Management interface.
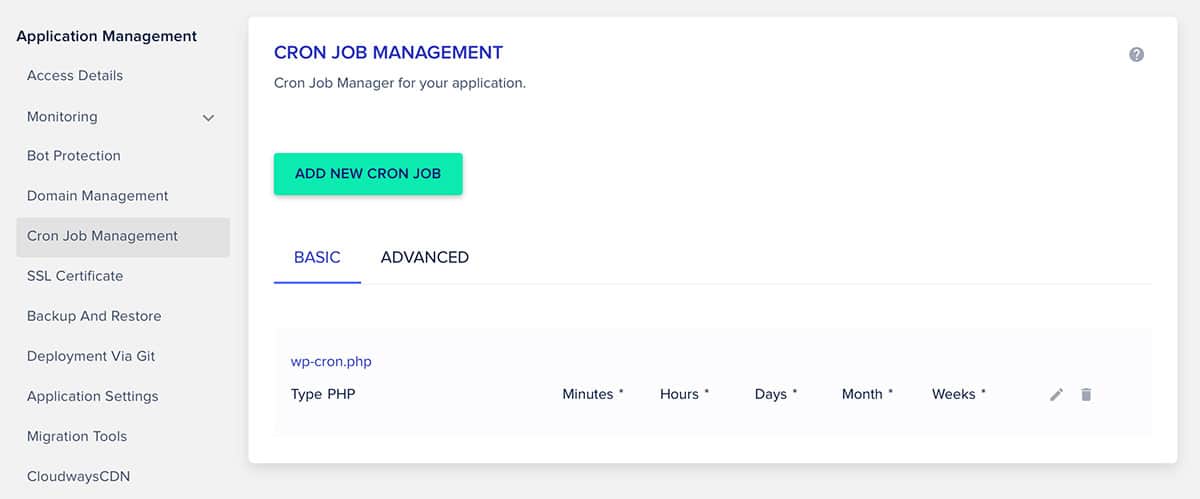
You can see my existing Cron job along the bottom row. It specifies the Type of job, which is PHP in this case. The specific file of wp-cron.php shows above the type. The values for the timing of your Cron job are conveniently supplied by some defaults in Cloudways.
Click the button to ADD NEW CRON JOB.
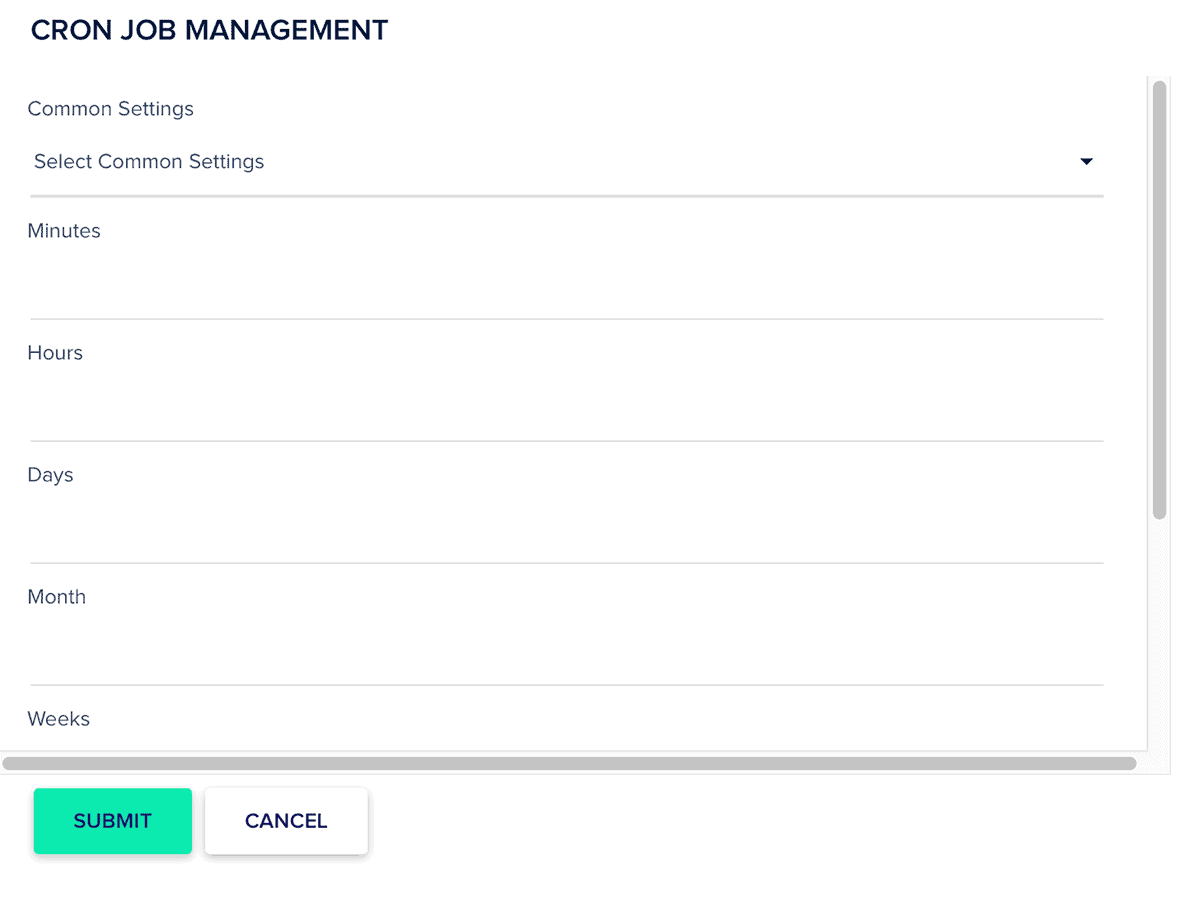
The first line shows a drop-down menu for common settings. Click that and select the option to run every minute (or whatever interval you need). Do not change the values created by your selection in Common Settings.
Next, scroll down to the bottom of the form.
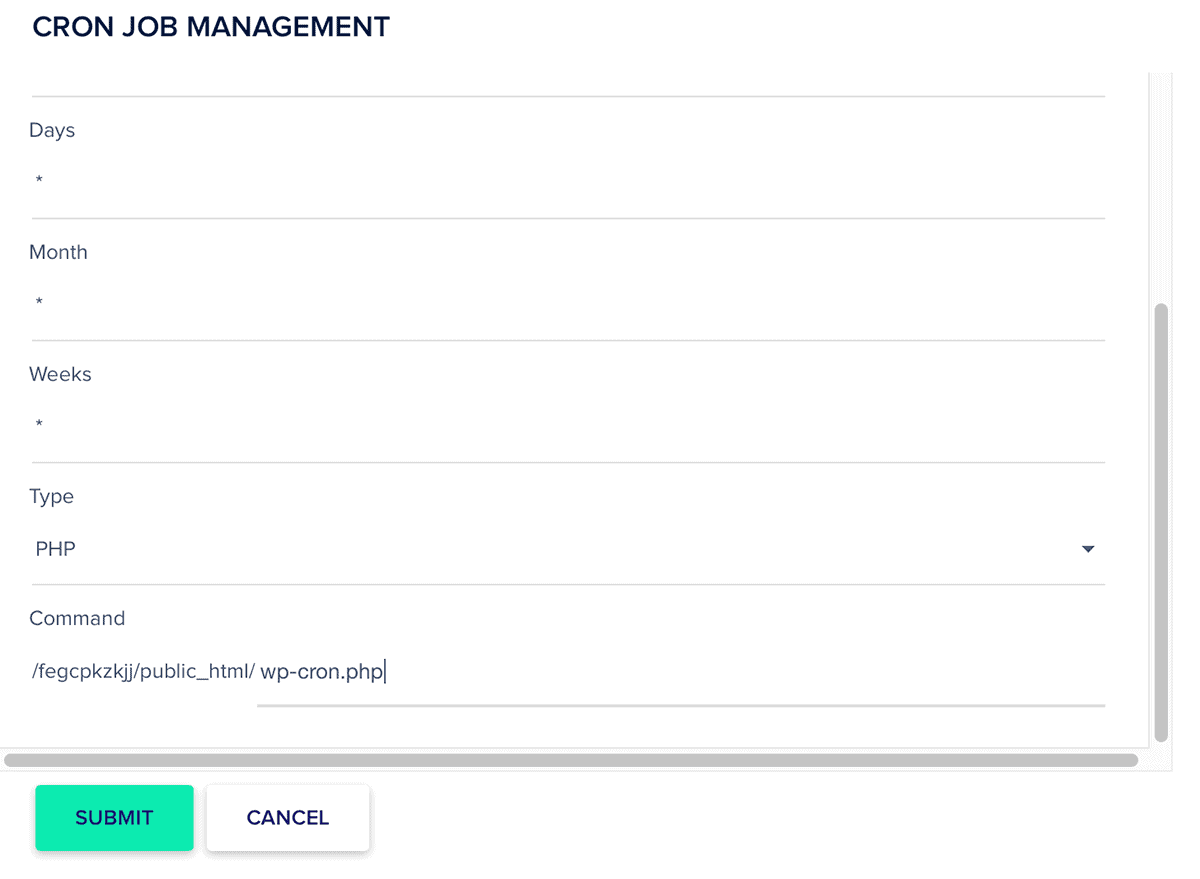
Make sure you select PHP from the Type drop-down.
On the command line, you’ll see your domain name/public_html/ – you cannot change this part. After that, enter “wp-cron.php” in the field, as shown here.
Click the Submit button. That’s it, you now have an active Cron job on your Cloudways server.
How to check if your Cron job works inside of FluentCRM
Now that you have your Cron job created and it’s pointing to your WordPress instance, it’s time to see if things are working correctly.
In the FluentCRM controls, go to Settings, and then into Tools.
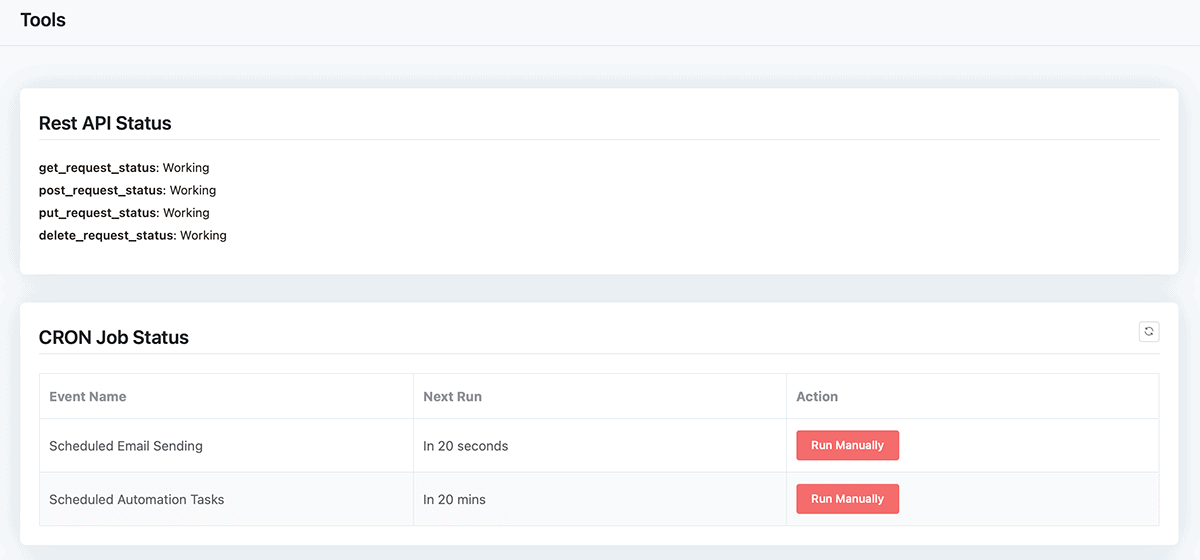
It’s important to note that the REST API Status is Working. If not, you may need to work with your web host support to determine if something is interfering with the REST API.
Next, check the CRON Job Status block. You should see the time countdown until the Next Run. This is not a live countdown, so you may need to refresh the page to ensure that the time is actually counting down. Once it fires, it’ll start over with the amount of time you selected in your Cron job interval.
Those are the two best things to investigate if you have a problem with your scheduled emails. If you use an external Cron service, check to ensure it’s enabled.
Verify your Cron job works in FluentCRM
Nothing works quite like a test. I recommend that you create a test email campaign to make sure that things work as expected.
The option to Review & Send an email is the last step in a campaign. At the bottom of that screen, you’ll see an option to Send the Emails Now or Schedule the Emails. Select the option to Schedule.
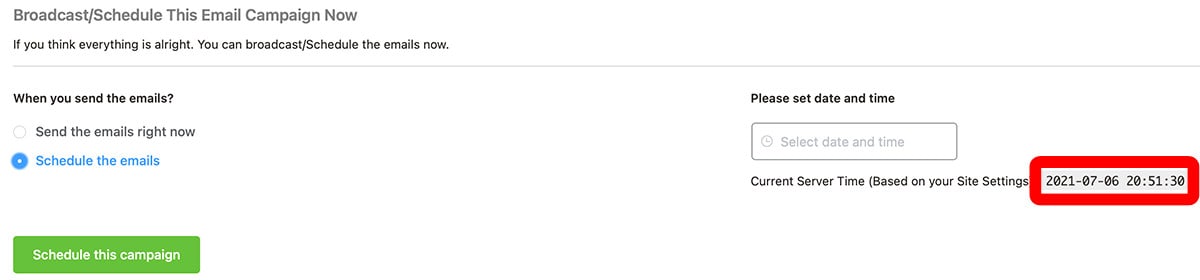
Note the server time in the red border on the Right side. Make sure you schedule your email AFTER this time and date. Otherwise, your email will send immediately. You want to schedule your email a few minutes in the future to ensure it works based upon the Cron job.
Click the field under Please set date and time to select your schedule.
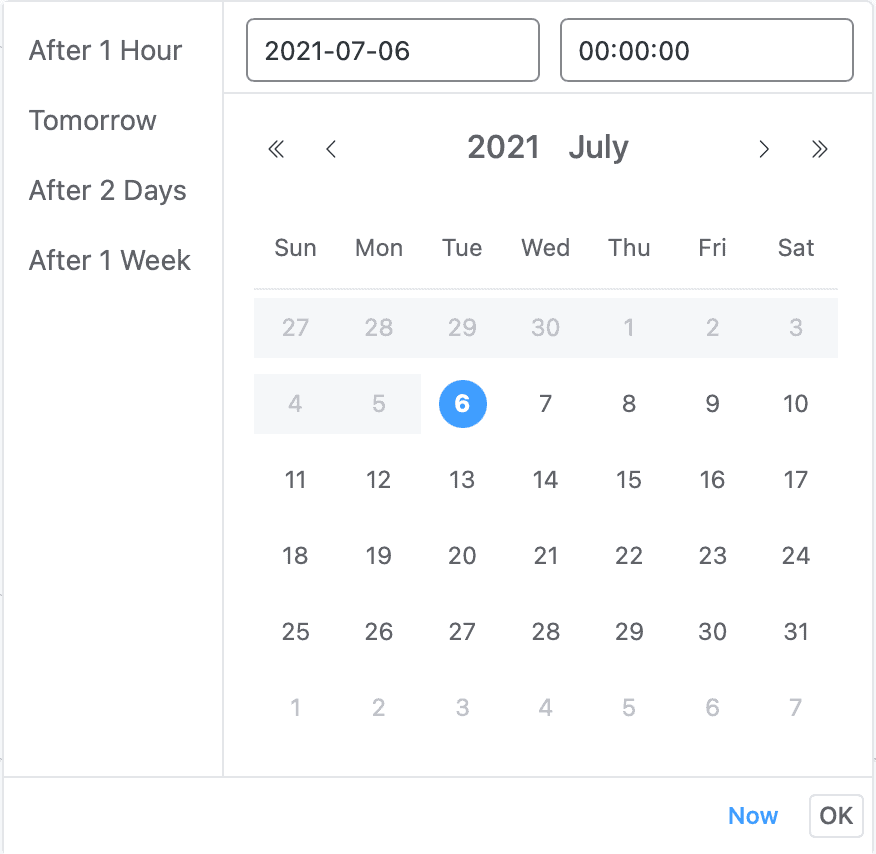
There are some common presets on the left column. You can use the calendar to select the date that you want to send your email. Click in the clock field on the top-right and you’ll see a drop-down menu that lets you select the hour, minute and second to schedule your email.
Click the OK button and FluentCRM will process the email to send to your recipients at the scheduled time. You should see the results when you get your email delivery.
FluentCRM is a powerful WordPress plugin that allows you to create a fully functional CRM. You can connect it with services like AWS Simple Email Service, MailGun, or others to send email campaigns.
With FluentCRM, you only pay for the email you send, making it a cost-effective email marketing solution. In addition, FluentCRM integrates with eCommerce solutions and other software to keep track of your subscriber's purchases and progress in learning systems like LearnDash.
It's the best WordPress-based CRM on the market.
SAVE 20% with Discount Code BEEM
Email deliverability: Depends upon choice of email service integration
- Low cost of operation
- Many integrations with other tools and services
- Continuous updates enhance the product
- FREE version available (no Pro features)
- Easy segmentation with Tags and Lists
- Plenty of automation possibilities and easy to create
- Inbound and Outbound webhooks for integration
- FluentConnect plugin (free) to integrate with ThriveCart
- No mobile app to use FluentCRM
- No templates for emails or landing pages
- No automation templates
Not sure which email marketing service provider is right for your business? Check out our email marketing services.
Best Email Marketing Services


So you need to set up a cron job when you are not using amazons SES/AWS for sending emails?
Or do you always need to set this up?