
Your FluentCRM contacts are the most important part of your email marketing automation system.
When you think about it, you wouldn’t use any part of a CRM without Contacts. Those are your leads, your customers and your purpose in business.
In order to serve your Contacts well, you need to understand their needs and desires so you can send them the right message at the right time.
Understanding how to use the power of FluentCRM tools helps you build a profile so you can record information that helps you serve your audience.
Video: How to Use FluentCRM Contacts
If you prefer to watch instead of reading, check out this video on YouTube. Feel free to subscribe for more info on using FluentCRM and other resources for your business.
How to use FluentCRM Contacts, Lists, Tags and Dynamic Segments
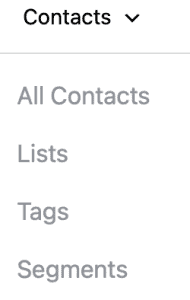
How to Find the Contacts Area
From the FluentCRMDashboard, the second menu item along the header is a drop-down menu labeled Contacts.
You can also find Contacts in the WordPress menu along the left sidebar.
The advantage of the dashboard dropdown menu is that you get quick access to all of the features related to Contacts, including:
There is one more area related to Contacts not found here, and that’s the ability to add Custom Fields to Contact records. We’ll discuss that further along in the article.
Adding Contacts into FluentCRM
There are three methods to get entries in your Contacts records.
- Manually add a record
- Import a CSV file with Contact values
- Create a form for users to opt-in to your CRM
Let’s take a look at the first two methods.
How to Manually add a record into Contacts
Just below the FluentCRM menu on the Contacts page, you’ll find a few buttons on the upper-right corner. Click the + Add button to reveal this form.
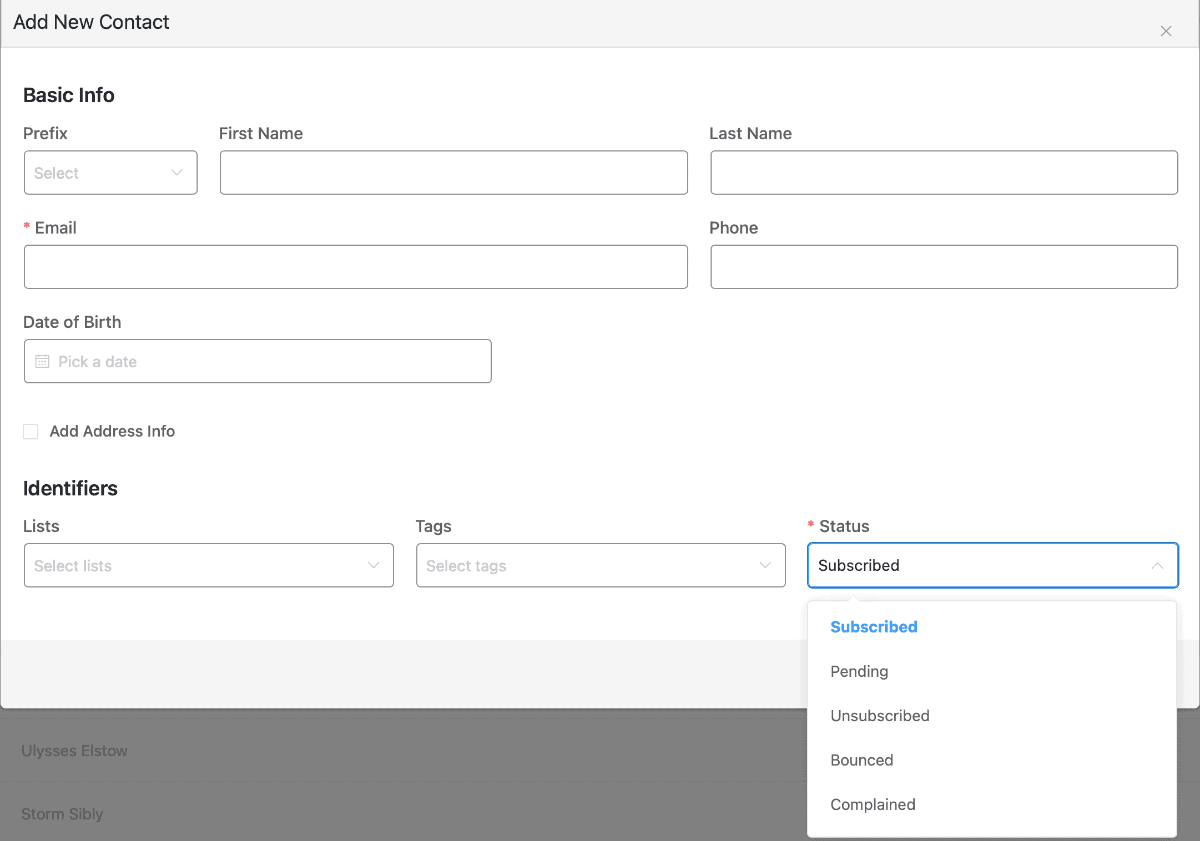
You can add Contact records one at a time using this method. Most of the fields are self-explanatory, but there are two required fields on this form.
The Email field is the first required field. You can’t communicate with a Contact if you don’t have an Email address, at least from the perspective of sending emails through Campaigns, Sequences, or Automations.
The next required field is Status. You can only send emails to people with Subscribed status. However, that may not be the best one to use for adding leads or customers to your CRM.
When you add a Contact as Subscribed, you can automatically start sending them messages. Subscribed records act as Confirmed records. If you have consent from a user recorded elsewhere, this may be appropriate.
If you add someone as Pending, they receive an email requesting them to click a URL to confirm that they want to be in your system.
The other Status options typically aren’t used for manual record entry, unless you want to test something to see what happens to a user who enters one of those Status conditions.
How to Import Users in Bulk Using a CSV File
If you’re migrating from another email service provider or CRM, you likely have a list of confirmed subscribers that you can export in a comma-separated value file, or CSV.
If you need to test entries, you can get some dummy data from a site called Mockaroo.
The site generates random user data, including email addresses, that you can use in testing.
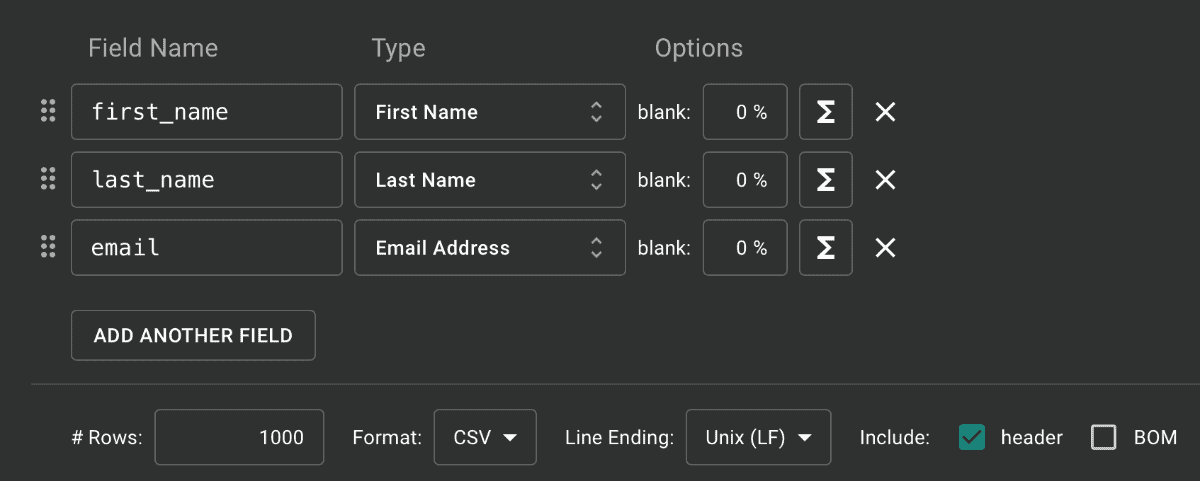
You can see that it’s a pretty simple interface. The default includes more data than I need for testing, but you can add more fields from a list of 157 different types of data for your testing purpose.
At the bottom, you can choose how many records you need, which format to use, how to encode the file, and more. It’s available for free for a small batch of records, but they have pricing plans for needs beyond what I’m demonstrating here.
Next to the + Add button mentioned above, there’s a button to Import. Once you click that, you get a form like this one.
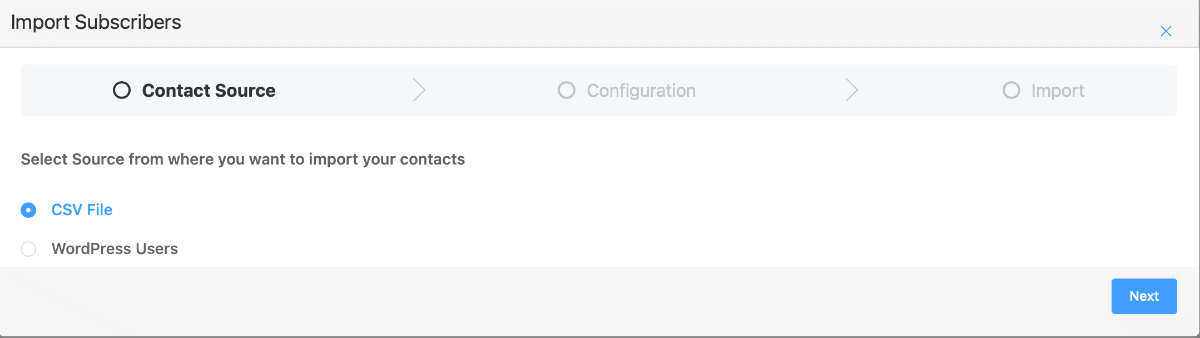
You have a choice of sources. If you want to import WordPress users from your installation, you can choose the second option. For other data, use the CSV format. Choose an option and click Next.
Assuming you went with a CSV file, you have to choose your delimiter.
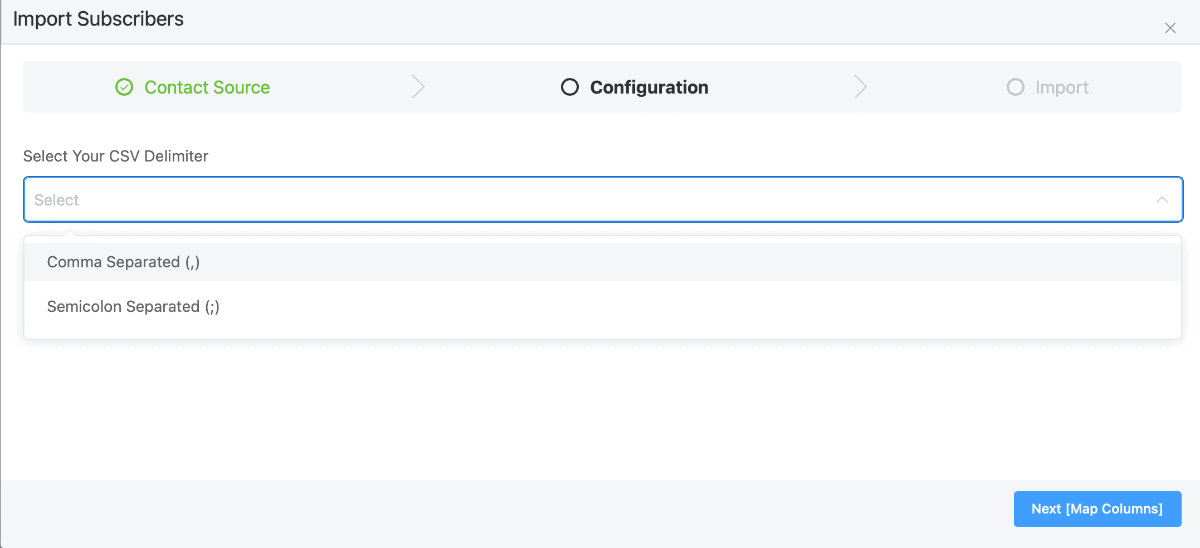
In most cases, you’ll use the Comma separator. There’s an option if your file uses a semicolon, instead.
After you make that choice, the form will expand to show an area to drop your CSV file, and you complete by choosing the blue-button Next, where you can map the fields between your file and the FluentCRM fields.
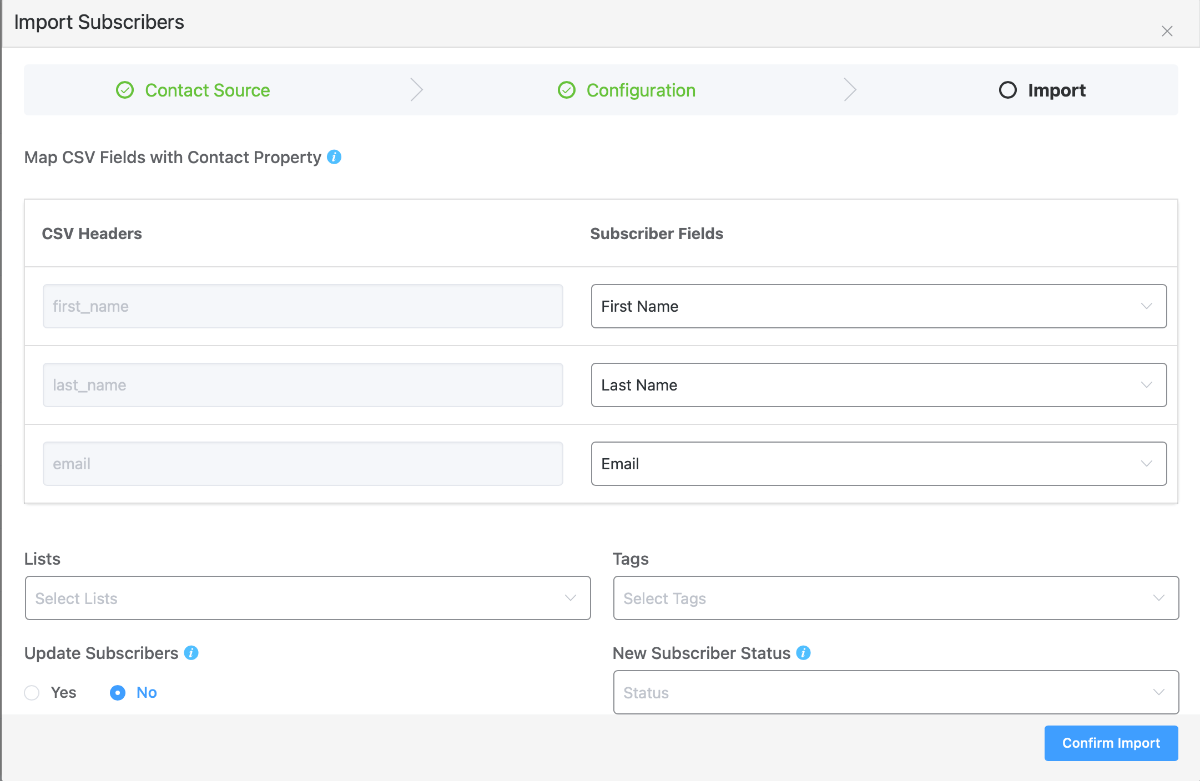
This interface allows you to map fields based upon the CSV headers on the left to match the Subscriber Fields on the right. FluentCRM does a good job of matching common field names, as you see here.
Each of the fields on the right is a drop-down field. You may need to select something if the system doesn’t match things correctly upon import.
As with the manual record, you have an option to set your New Subscriber Status. In most cases, you’ll select Subscribed. That’s because it’s likely you’re importing users that you previously confirmed on another email service provider or CRM.
On the bottom left, there’s an option to Update Subscribers. If you have a record in your Contacts and it also exists when you import, this option lets you decide if you want to overwrite your existing record with the value inside the imported file.
When ready, click the blue Confirm Import button to start the process.
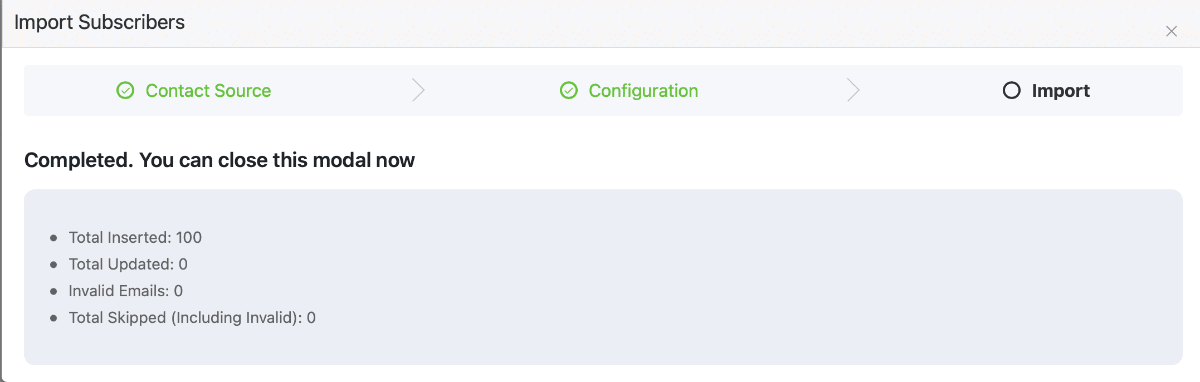
When the import completes, you’ll see a notice like this one to show you the results of your import.
Options to Export Users from FluentCRM
Just as you need to get data into your CRM, sometimes you need to export data for use in other tools or when migrating to another CRM.
In the upper right corner of FluentCRM, there’s an Export button right next to the Import button. Once you press that button, you get this interface.
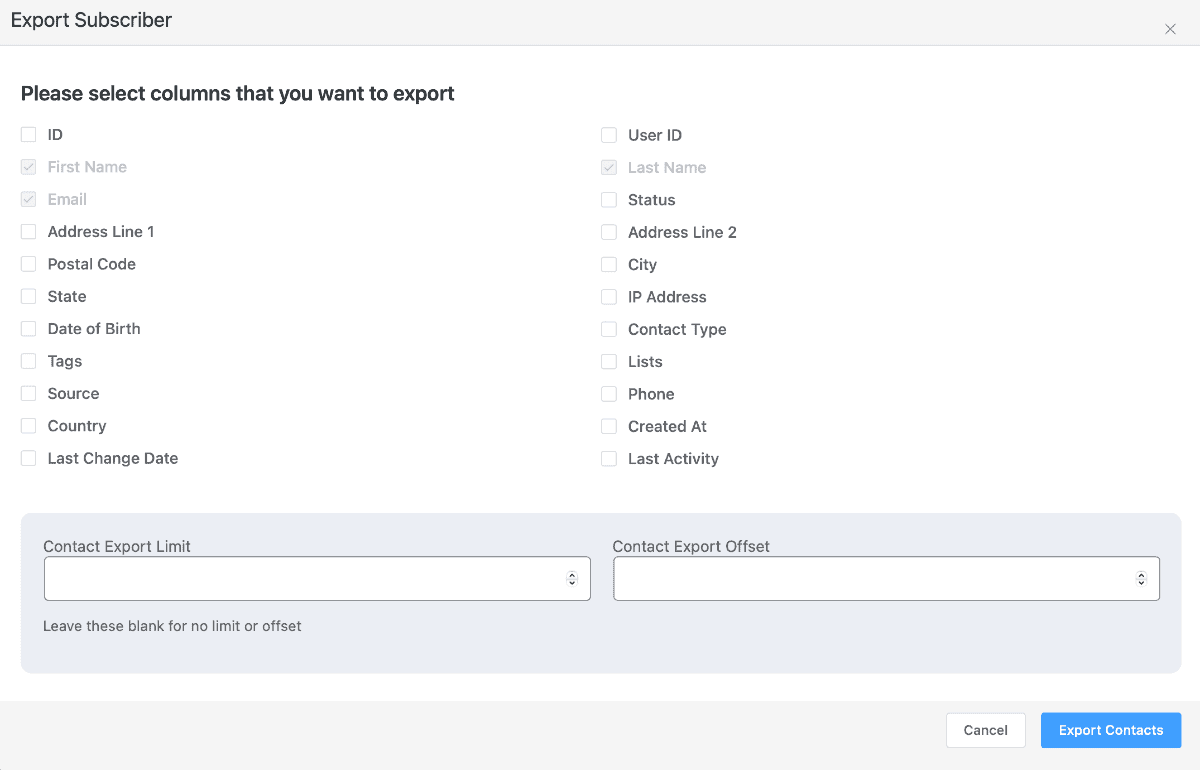
You see a series of checkboxes to indicate the fields that you want to export. Since I only imported data for First Name, Last Name, and Email, I have no other data to export.
There are two fields on the bottom part of the form.
The Contact Export Limit allows you to place a limit on how many records you export in this session. The Contact Export Offset lets you provide a record position to start exporting somewhere other than the first existing record.
For example you may want to work in sections to export a given number of records at a time, and then pick up the next collection using the Export Offset.
Note that the Export tool does not have any filters. If you want to export Contacts based upon criteria, use the Filter options on the Contact page to create your target group, and then choose to Export Contacts
How to Work with Contact Records
There are two major sections of a Contact record. There’s a header with some useful information at a glance, so we’ll start there.

Going from left to right, the first thing you see is the user’s avatar. If no photo exists for an avatar, FluentCRM uses your default WordPress setting to display an image.
Next, you find the user’s name and two drop-down fields. The first one indicates if the user is a Lead or a Customer. The second indicates their Subscription Status (Subscribed, Pending, etc.).
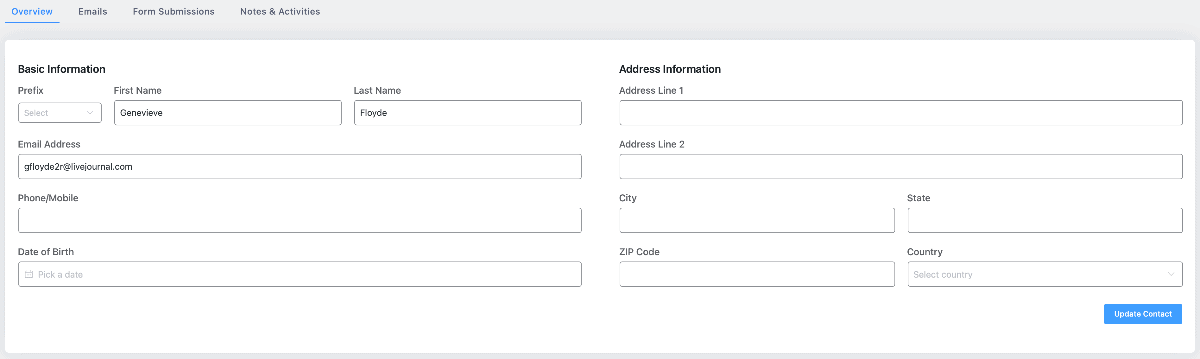
The bottom section displays fields with Basic Information about your Contact. Remember, this user displayed comes from the Mockaroo site. It’s not a real person’s name or contact info.
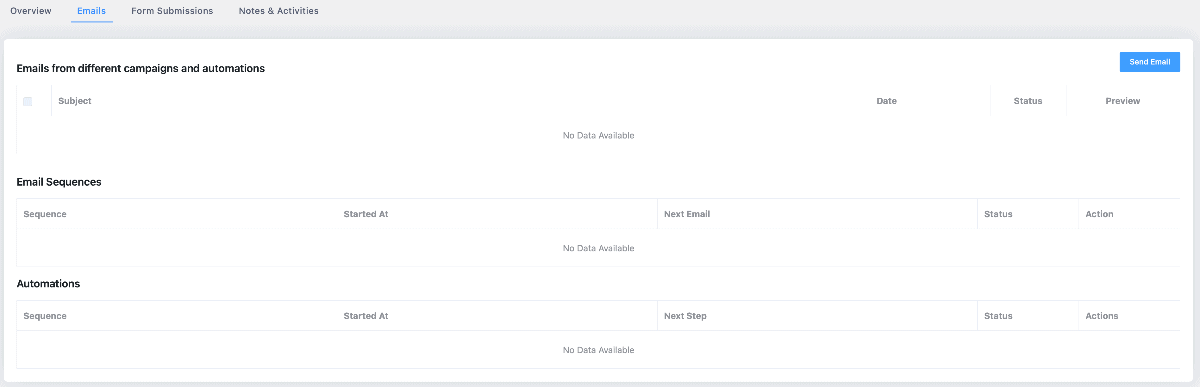
On the Email tab, you can find the history and status of your Subscriber. The first section shows emails sent from Campaigns and Automations.
Next, you see if the Contact is in any Email Sequences, and where she is within the Sequence.
Finally, you can see Automations where the user is active and where they are in the flow.
There’s a Pro feature on this page. Notice the blue button in the upper corner to Send Email. That allows you to easily reach out from FluentCRM to contact your subscriber. The free version of FluentCRM doesn’t have this feature.

FluentCRM comes with a free version of Fluent Forms so you can create email opt-in forms out of the box. Any users who subscribed based upon Fluent Forms appear in the Form Submission tab of the Contact record.
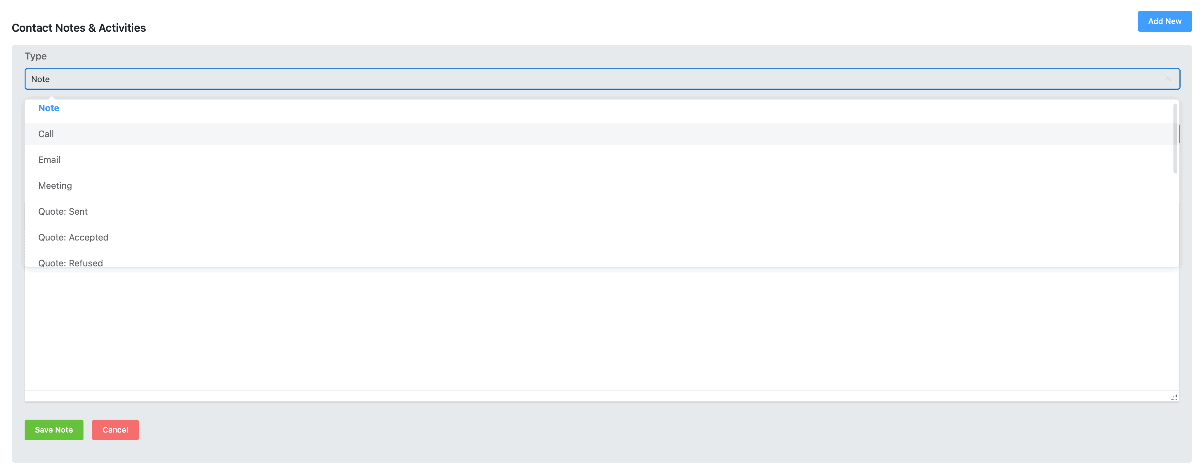
The final tab lets you update Notes & Activities for your contact. You can see some of the note types in the drop-down list on the screenshot, but there are many more types on the list.
How to Add Custom Fields to Contact Records
Sometimes you need to add data to a Contact record that a vendor couldn’t anticipate. It’s common for different businesses to need data that are specific to their industry or area.
Fortunately, FluentCRM allows you to create Custom Contact Fields from the Settings menu. When you add a new field, you see this interface to select a field data type.
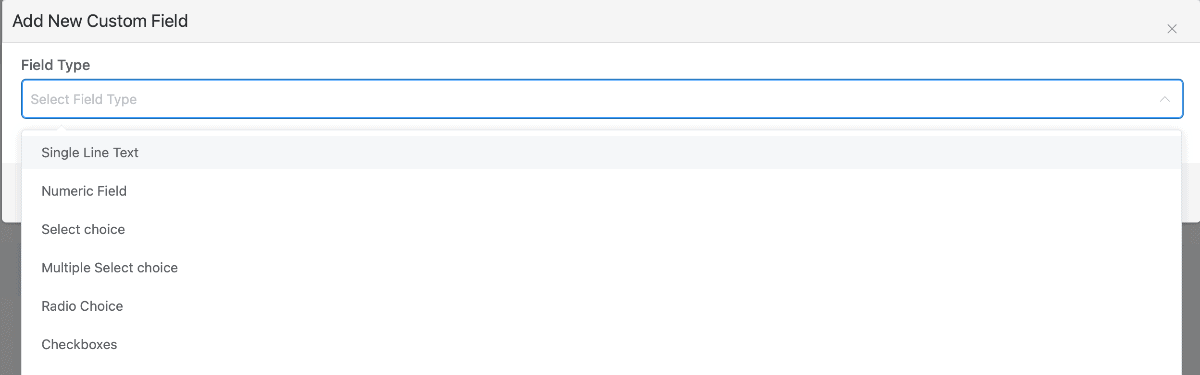
The dropdown menu doesn’t show all the field types until you scroll down, but there are two more field types related to Date and Time information.
If you create these Custom Contact Fields prior to adding users, you can map fields from your import file to the new custom fields.
What is a List in FluentCRM?
A list is a category or collection of users for a related purpose. You can add users to a List manually or through Automation.
When you add a new Contact through a Form, Import, or Manual input, you can choose to add them to a List to create segments of users based upon their needs, interests, or position in your workflow.
Nurturing new leads requires different messages than you would use for an existing customer. Therefore, you need different lists so you can easily send the right email to a contact at the right part of their journey with you and your business.
You May Prefer Using a Dynamic Segment
A Dynamic Segment is like a list, but it uses criteria to automatically determine who is or isn’t included.
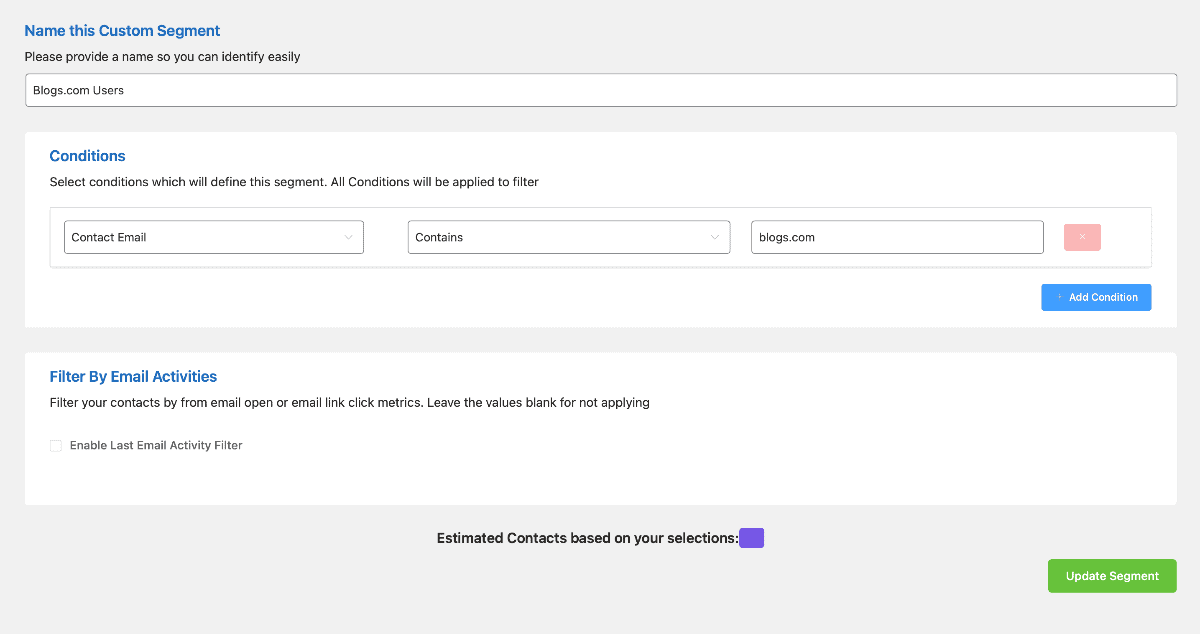
Dynamic segments update in real-time based upon the conditions you set. It can be simple, like the example above that looks for Contacts with an email address in a specific domain.
You can choose different criteria and combine multiple conditions to create your query to update the dynamic list. That kind of power saves you time with manual intervention and ensures you have the right people on your dynamic segment.
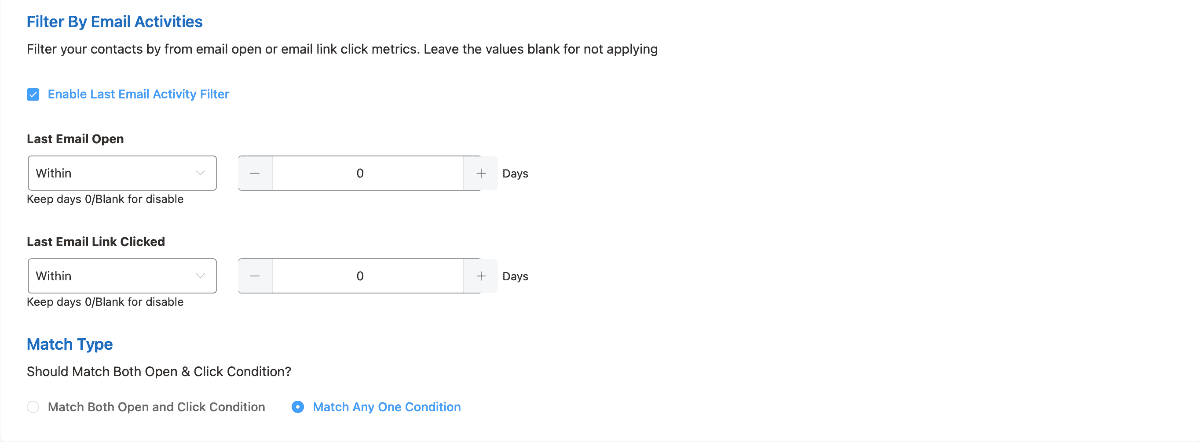
If you check the box to Enable Last Email Activity Filter, you get some interesting options. This lets you create a Dynamic Segment based upon how engaged a user is with your emails. You can tell which Contacts are Hot or Cold based upon when they open your emails or click your links.
This feature allows you to create lead scoring, something that SaaS email service providers charge a hefty fee to allow.
The Purpose of a TAG in a CRM System
Tags are one of the most misunderstood tools in any CRM or email service provider tool. People use them without much thought and end up with a mess that’s difficult to organize or manage.
Although you CAN send emails based upon Contacts who have a specific Tag, I don’t think that’s the best way to use a Tag.
You should use Tags to supplement your Contact Record and provide information about your Contact. Tags are essentially metadata about your Contact as they interact with your business.
You can apply a Tag to a contact as a signal to start or stop an Automation. Another use for a Tag is to create profile information indicating the interests of a Contact. History tags keep a record of all the interactions a contact had with your business.
Hopefully, you get the idea.
Sending emails in FluentCRM works best with Lists and Dynamic Segments. You can use Tags as part of your query to create a Dynamic Segment, too.
Give some thought before you create a tag to ensure that it’s easily understood and searchable in your system. I wrote an article showing the best way to name a Tag in your CRM, so please read that before you start creating Tags.
FluentCRM 3.0 is a self-hosted email marketing and CRM solution rebuilt on Vue 3 for 50% faster performance. Native SMS marketing, AI email writing (ChatGPT, Claude, Grok), and deep integration with FluentCart, FluentCommunity, and LearnDash. Enterprise-grade automation and data sovereignty without recurring SaaS fees.
- Vue 3 Infrastructure: 50% faster dashboard, 10X faster bulk sending, maintains 100ms responsiveness with 100k+ contacts.
- Native SMS Marketing: Real campaigns, automations, and two-way conversations via Twilio or Amazon SNS. No third-party glue.
- AI Email Writing: 25 MCP tools integrate ChatGPT, Claude, and Grok directly into the editor for rapid campaign creation.
- Gutenberg-Native Builder: Reusable email blocks and patterns work just like WordPress pages.
- Decoupled SMTP: Separate CRM logic from email delivery (Amazon SES, Postmark, Mailgun) for zero-point-of-failure reliability.
- Fluent Stack Integration: Native connections to FluentCart (commerce), FluentCommunity (engagement), and LearnDash (education).
- Infrastructure Responsibility: Unlike SaaS, you are the Lead Architect. You are responsible for configuring your own Cron jobs and monitoring your SMTP handshake (Managed VPS recommended).
- VPS Requirement: Shared hosting will not perform adequately. A minimum 4 GB RAM / 2 CPU VPS costs ~$30/month, adding to your total cost of ownership.
Not sure which email marketing service provider is right for your business? Check out our email marketing services.
Best Email Marketing Services

Thank you for a “non-marketing” approach to describe the utility of FluentCRM.
This post triggered a thought/question and perhaps you would be kind enough to elaborate. Apropos, I did research post reading this article the knowledgebase of FluentCRM, but could not find any clarity there.
Apart from email action, is there a way to retrieve a list of contacts filtered by an existing tag? I mean, like display a list of contacts in a post (for any specific reason)? So, I tried doing this using the FluentCRM tokens, but these don’t render outside of FluentCRM widgets, hence they are not useful.
Thank you in advance for any clarity/tips you can offer in this regard.
With regards
Vy
PS: I am just a business user and not a techie.
Gdhsh